Guide / Getting started
Getting started (owners & admins)
Everything an owner or admin needs to set up TaskVox — about 5 minutes for the basics.
Step 1 — Create your organisation
- Open erp.taskvox.in/signup on your phone or laptop.
- Enter your organisation name (e.g. "Sharma Traders"), your name, work email and a password (at least 8 characters). Mobile number is optional.
- Tap Create organisation. You are now the Owner. A department called "General" and its chat channel are created for you.
Your Home screen shows a short checklist — follow it and you are set up in about five minutes.
Step 2 — Add departments
- Go to Team → Departments → New department.
- Type a name such as Sales, Accounts, Operations. Optionally choose a department head.
- Save. Every department automatically gets its own chat channel.
Departments drive everything: managers see and assign work only in their departments, broadcasts can target departments, and reports group by department.
Step 3 — Add employees
One person at a time
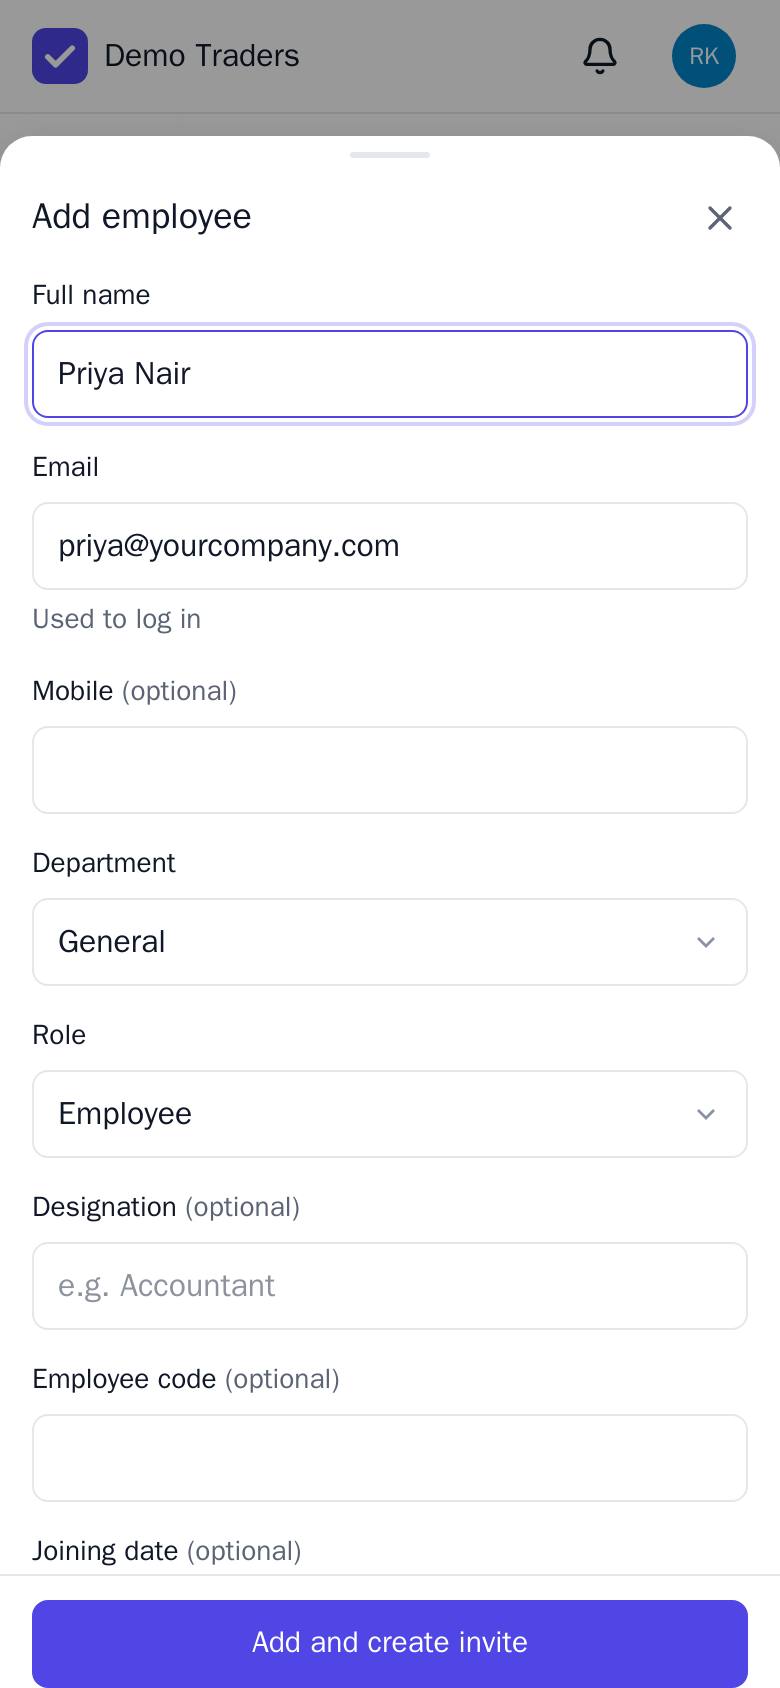
- Go to Team → People → Add employee.
- Fill full name, email (used to log in) or mobile, department and role. Designation, employee code and joining date are optional.
- Tap Add and create invite. You get an invite link.
Roles — who can do what
- Owner — everything, including adding admins and organisation settings.
- Admin — manage people and departments, assign tasks to anyone, broadcast to everyone, see all reports.
- Manager — assign and review tasks, broadcast and see reports for their own department.
- Employee — chat, do tasks, acknowledge broadcasts, post daily updates.
Many people at once (Excel / CSV)
- Team → People → Import CSV → Download template.
- Fill the sheet in Excel or Google Sheets: full_name, email, phone, department, role, designation, employee_code, joined_on. Save as CSV.
- Upload it. TaskVox checks every row first and shows mistakes like "Row 7 · email: Someone already uses this email". Nothing is added until all rows are correct.
- Tap Add people, then Download invite links to share them.
Step 4 — Share the invite link
Each new person gets a personal link that works once and is valid for 7 days.
- Right after adding someone, tap WhatsApp to send the link, or Copy link to paste it anywhere.
- The employee opens the link, sets a password and lands on their Home screen.
- Lost or expired link? Open the person in Team → People and tap New invite link.
Step 5 — Assign your first task
- Tap the big + button → New task.
- Write what needs to be done, search and select the person (or tap Whole Sales to give it to a full department).
- Pick a deadline chip — Today 6 PM, Tomorrow 10 AM … — or Pick… an exact time.
- Tap Assign task. The person is notified instantly.
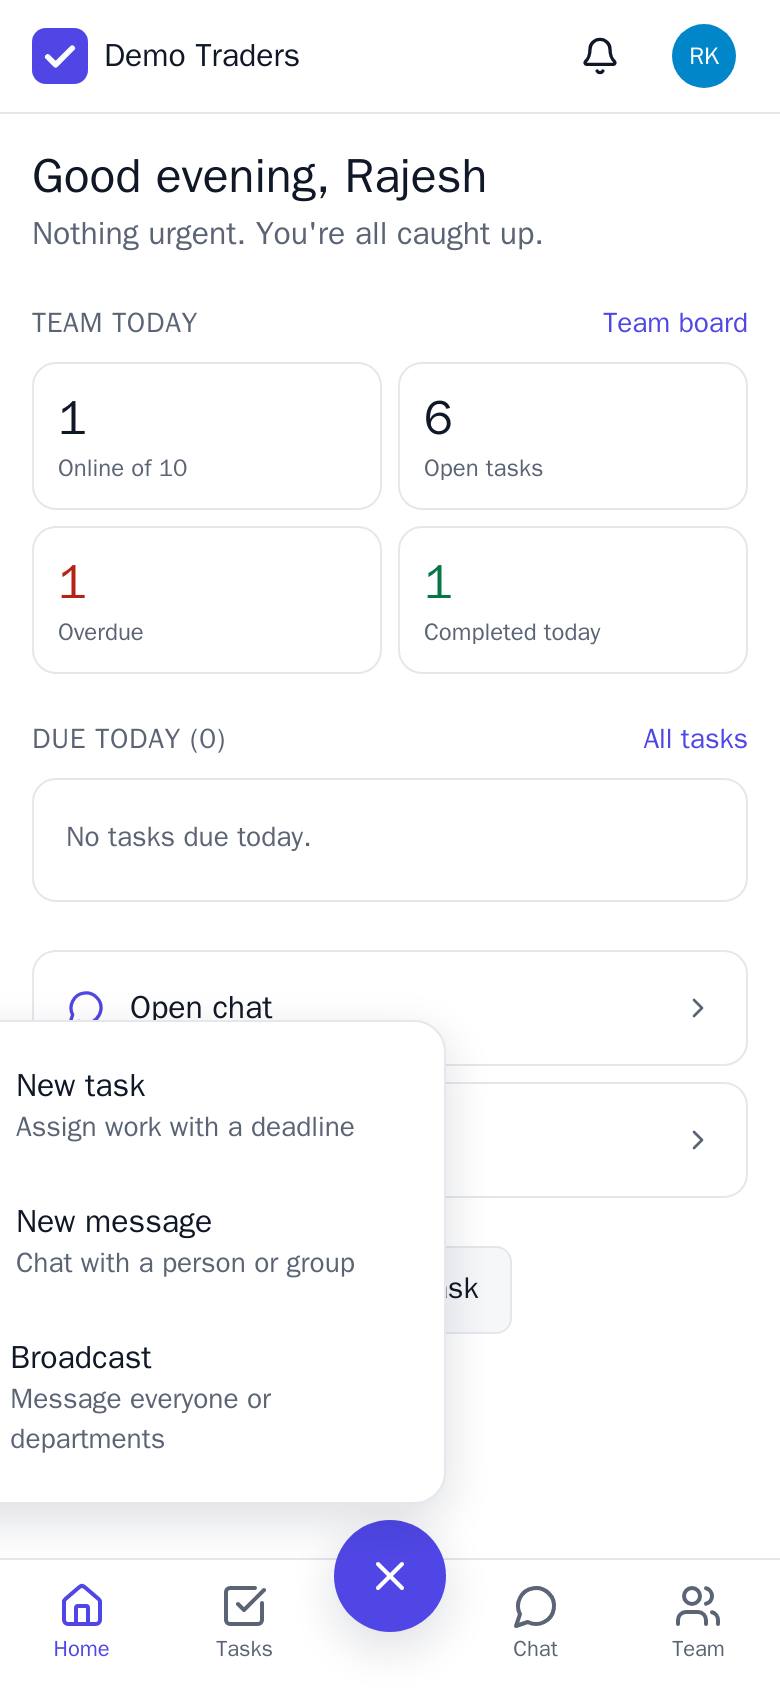
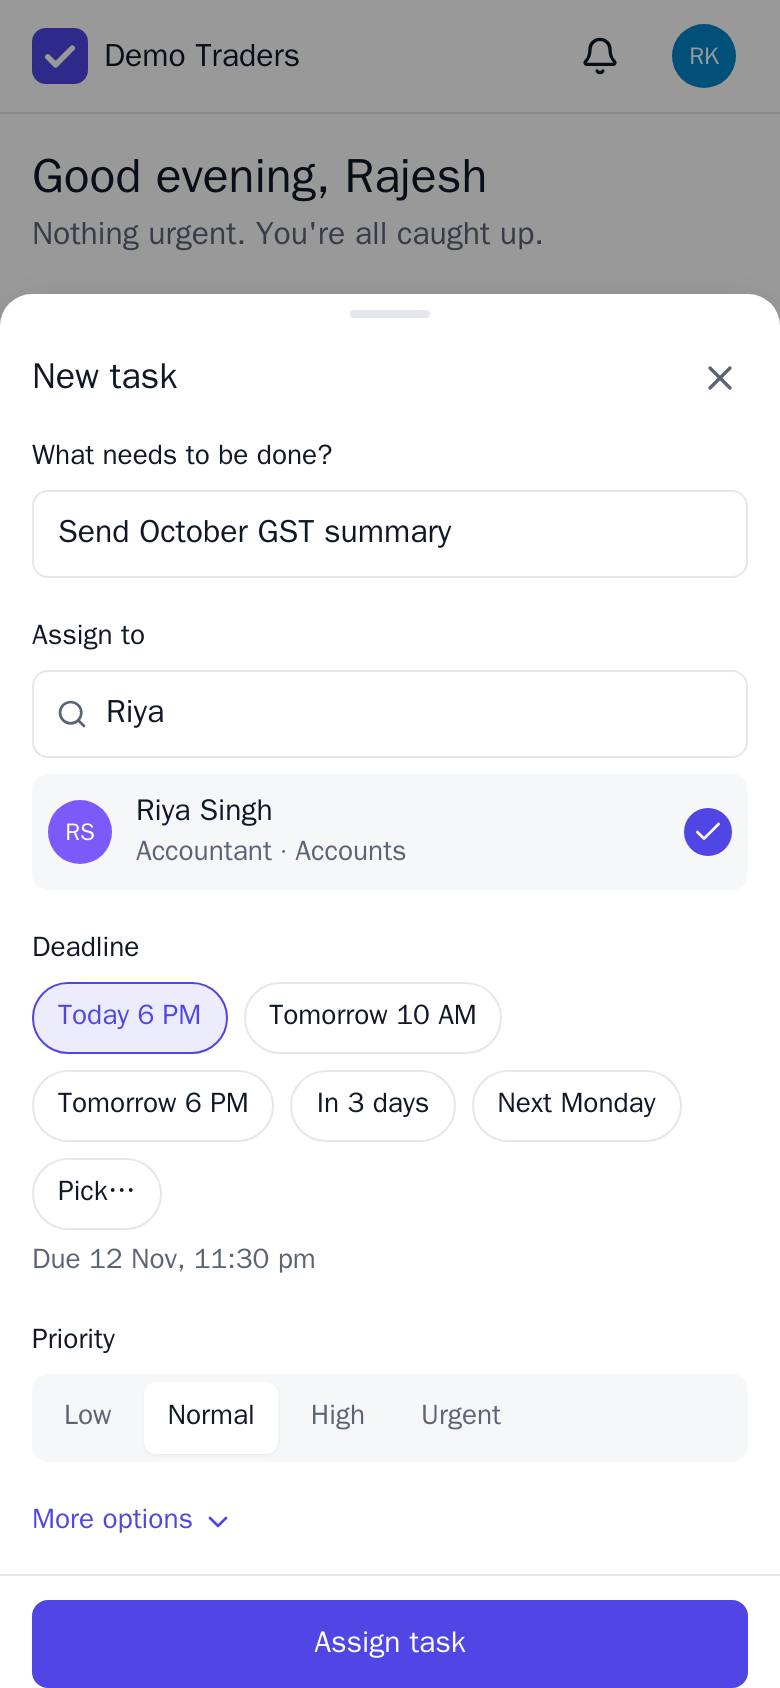
Giving one task to 5 people creates 5 copies, so each person's start, submit and on-time result is tracked separately.
Step 6 — Send a broadcast
- + → Broadcast. Choose Everyone or specific departments.
- Write a title and message. Turn on Ask everyone to acknowledge for important notices.
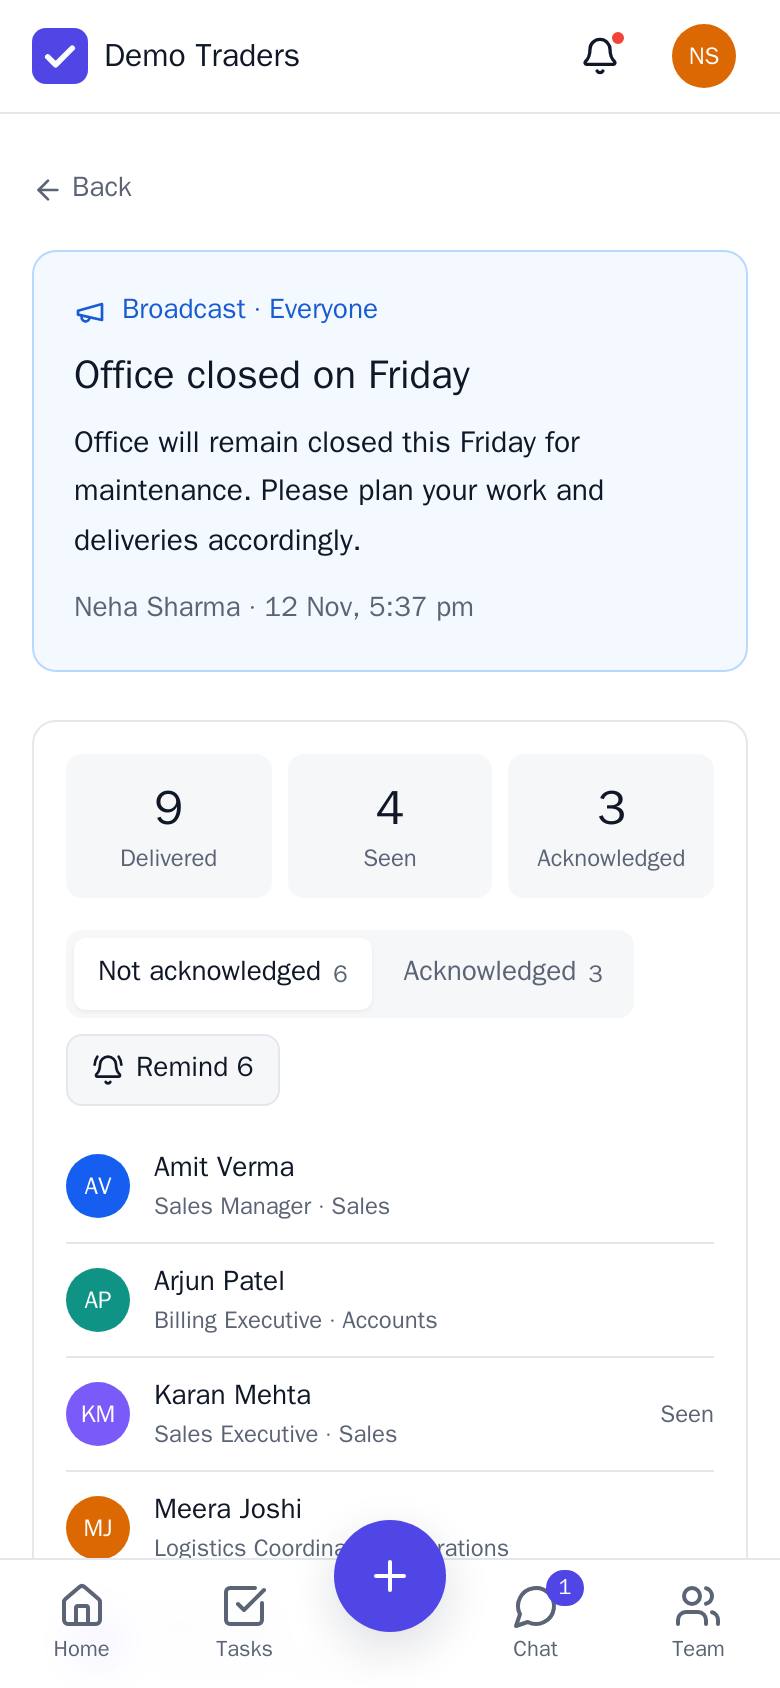
- Send. It is pinned on everyone's Home until they acknowledge. Open it to see who has seen it and tap Remind for the rest.
Step 7 — Track your team every day
- Home — tasks waiting for your review, overdue count, who is online.
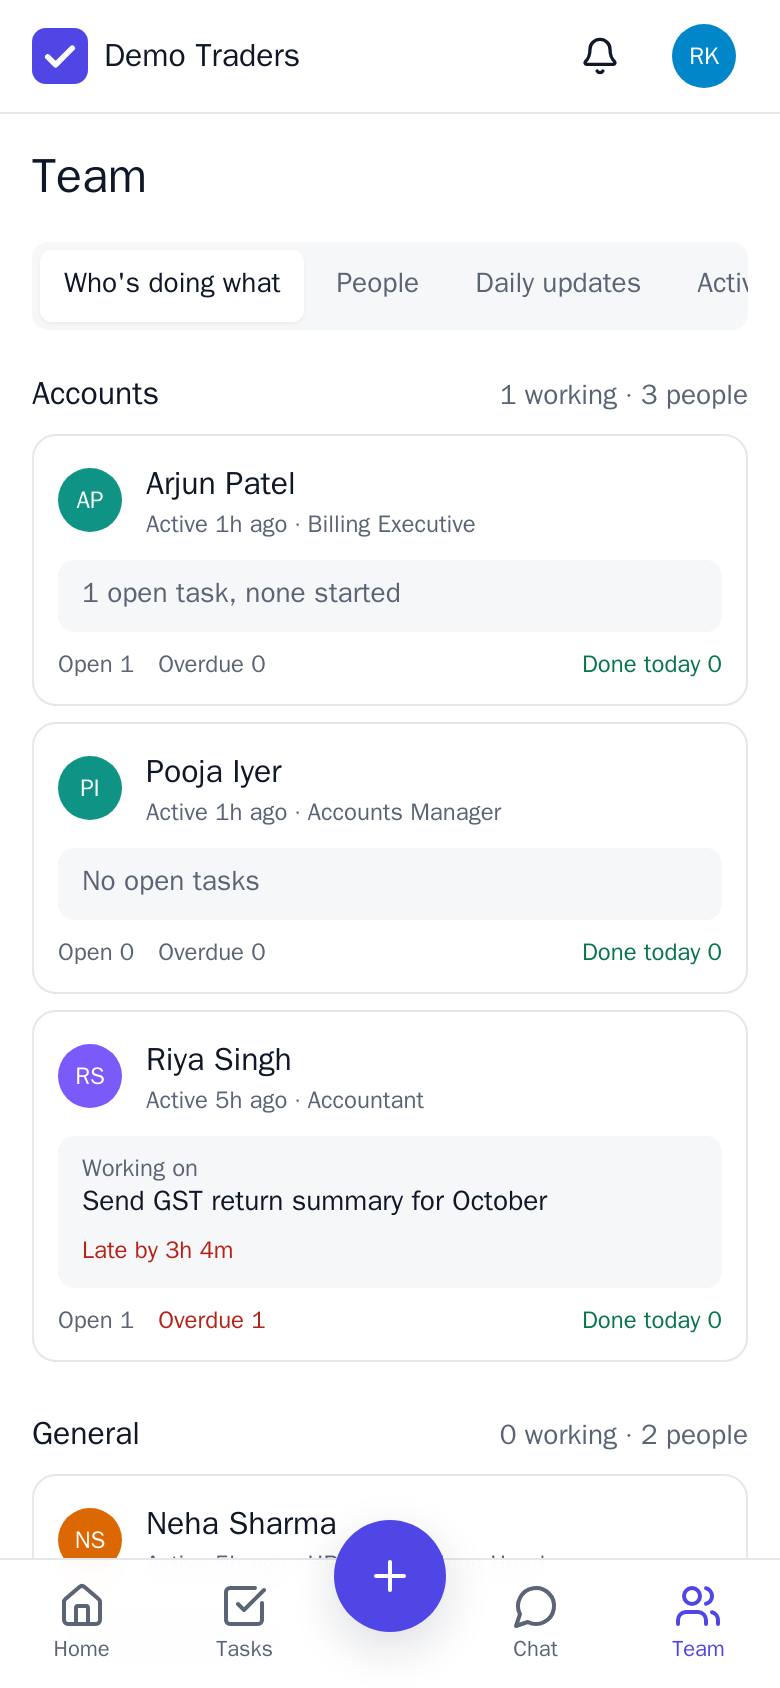
- Team → Who's doing what — every person's current task, overdue and done-today counts.
- Team → Daily updates — what each person did today and who hasn't posted.
- Team → Activity log — every assignment, submission, approval and change, filterable by department, person and date.
- Team → Reports — on-time %, average delay and turnaround per person or department; download as CSV.
Organisation settings
Settings (your photo, top-right on phone) lets the owner and admins change the organisation name and timezone (deadlines and reports use it) and decide whether employees may create group chats. Everyone can change their own name, mobile, password, theme and notification setting here.
When someone leaves, open them in Team → People → Deactivate. They are logged out immediately; their history stays for reports.